

Foolproof Homemade Sourdough Recipe

Homemade sourdough is the best bread for you. Why?
For starters it has the fewest ingredients: flour, water, & salt. Plus, it has been apart of the human diet for thousands of years and is rich in essential vitamins, nutrients, and lactic acid (the “good acid”). On a chemical level, its fermentation process makes it easier to digest and lowers its glycemic index, preventing drastic blood sugar spikes. This process breaks down gluten and fosters beneficial bacteria that support gut health. More on the benefits of sourdough here.
Creating a sourdough starter from scratch is the first step. Growing this living culture of wild yeast and bacteria may seem daunting as people tend to gatekeep their methods or overcomplicate the process. But after a few weeks of trial and error, I can confidently say I’ve achieved a simple and foolproof way to make both a starter from scratch and a delicious sourdough loaf.
The Starter (No discard)
Materials
Glass Jar (I used a marinara sauce jar)
Rubber band
Filtered Water
Unbleached Flour
Silicone Stirrer
Steps
On days 1-3 put 1 TBS of flour and 1 TBS of water in the jar, combine, then put the lid on loosely. Place in a spot with consistent temperature not too cold not too hot.
On days 4-6 double the flour to 2 TBS and continue with 1 TBS of water. On days 6-10 feed the starter twice a day, once in the morning & once at night.
By day 8, if the starter is doubling in size after about 4 hours of being fed, clings to the slides of the jar, and shows fermentation bubbles it should be ready to use.
Step 2: The Baking
Now it’s time to bake…
Steps
Combine 1/2c of active starter with 1 1/3c of warm-hot water and mix.
Add 3c of unbleached flour and 1 1/2 teaspoons of salt and combine.
Leave with a tea towel covering it for 30 minutes.
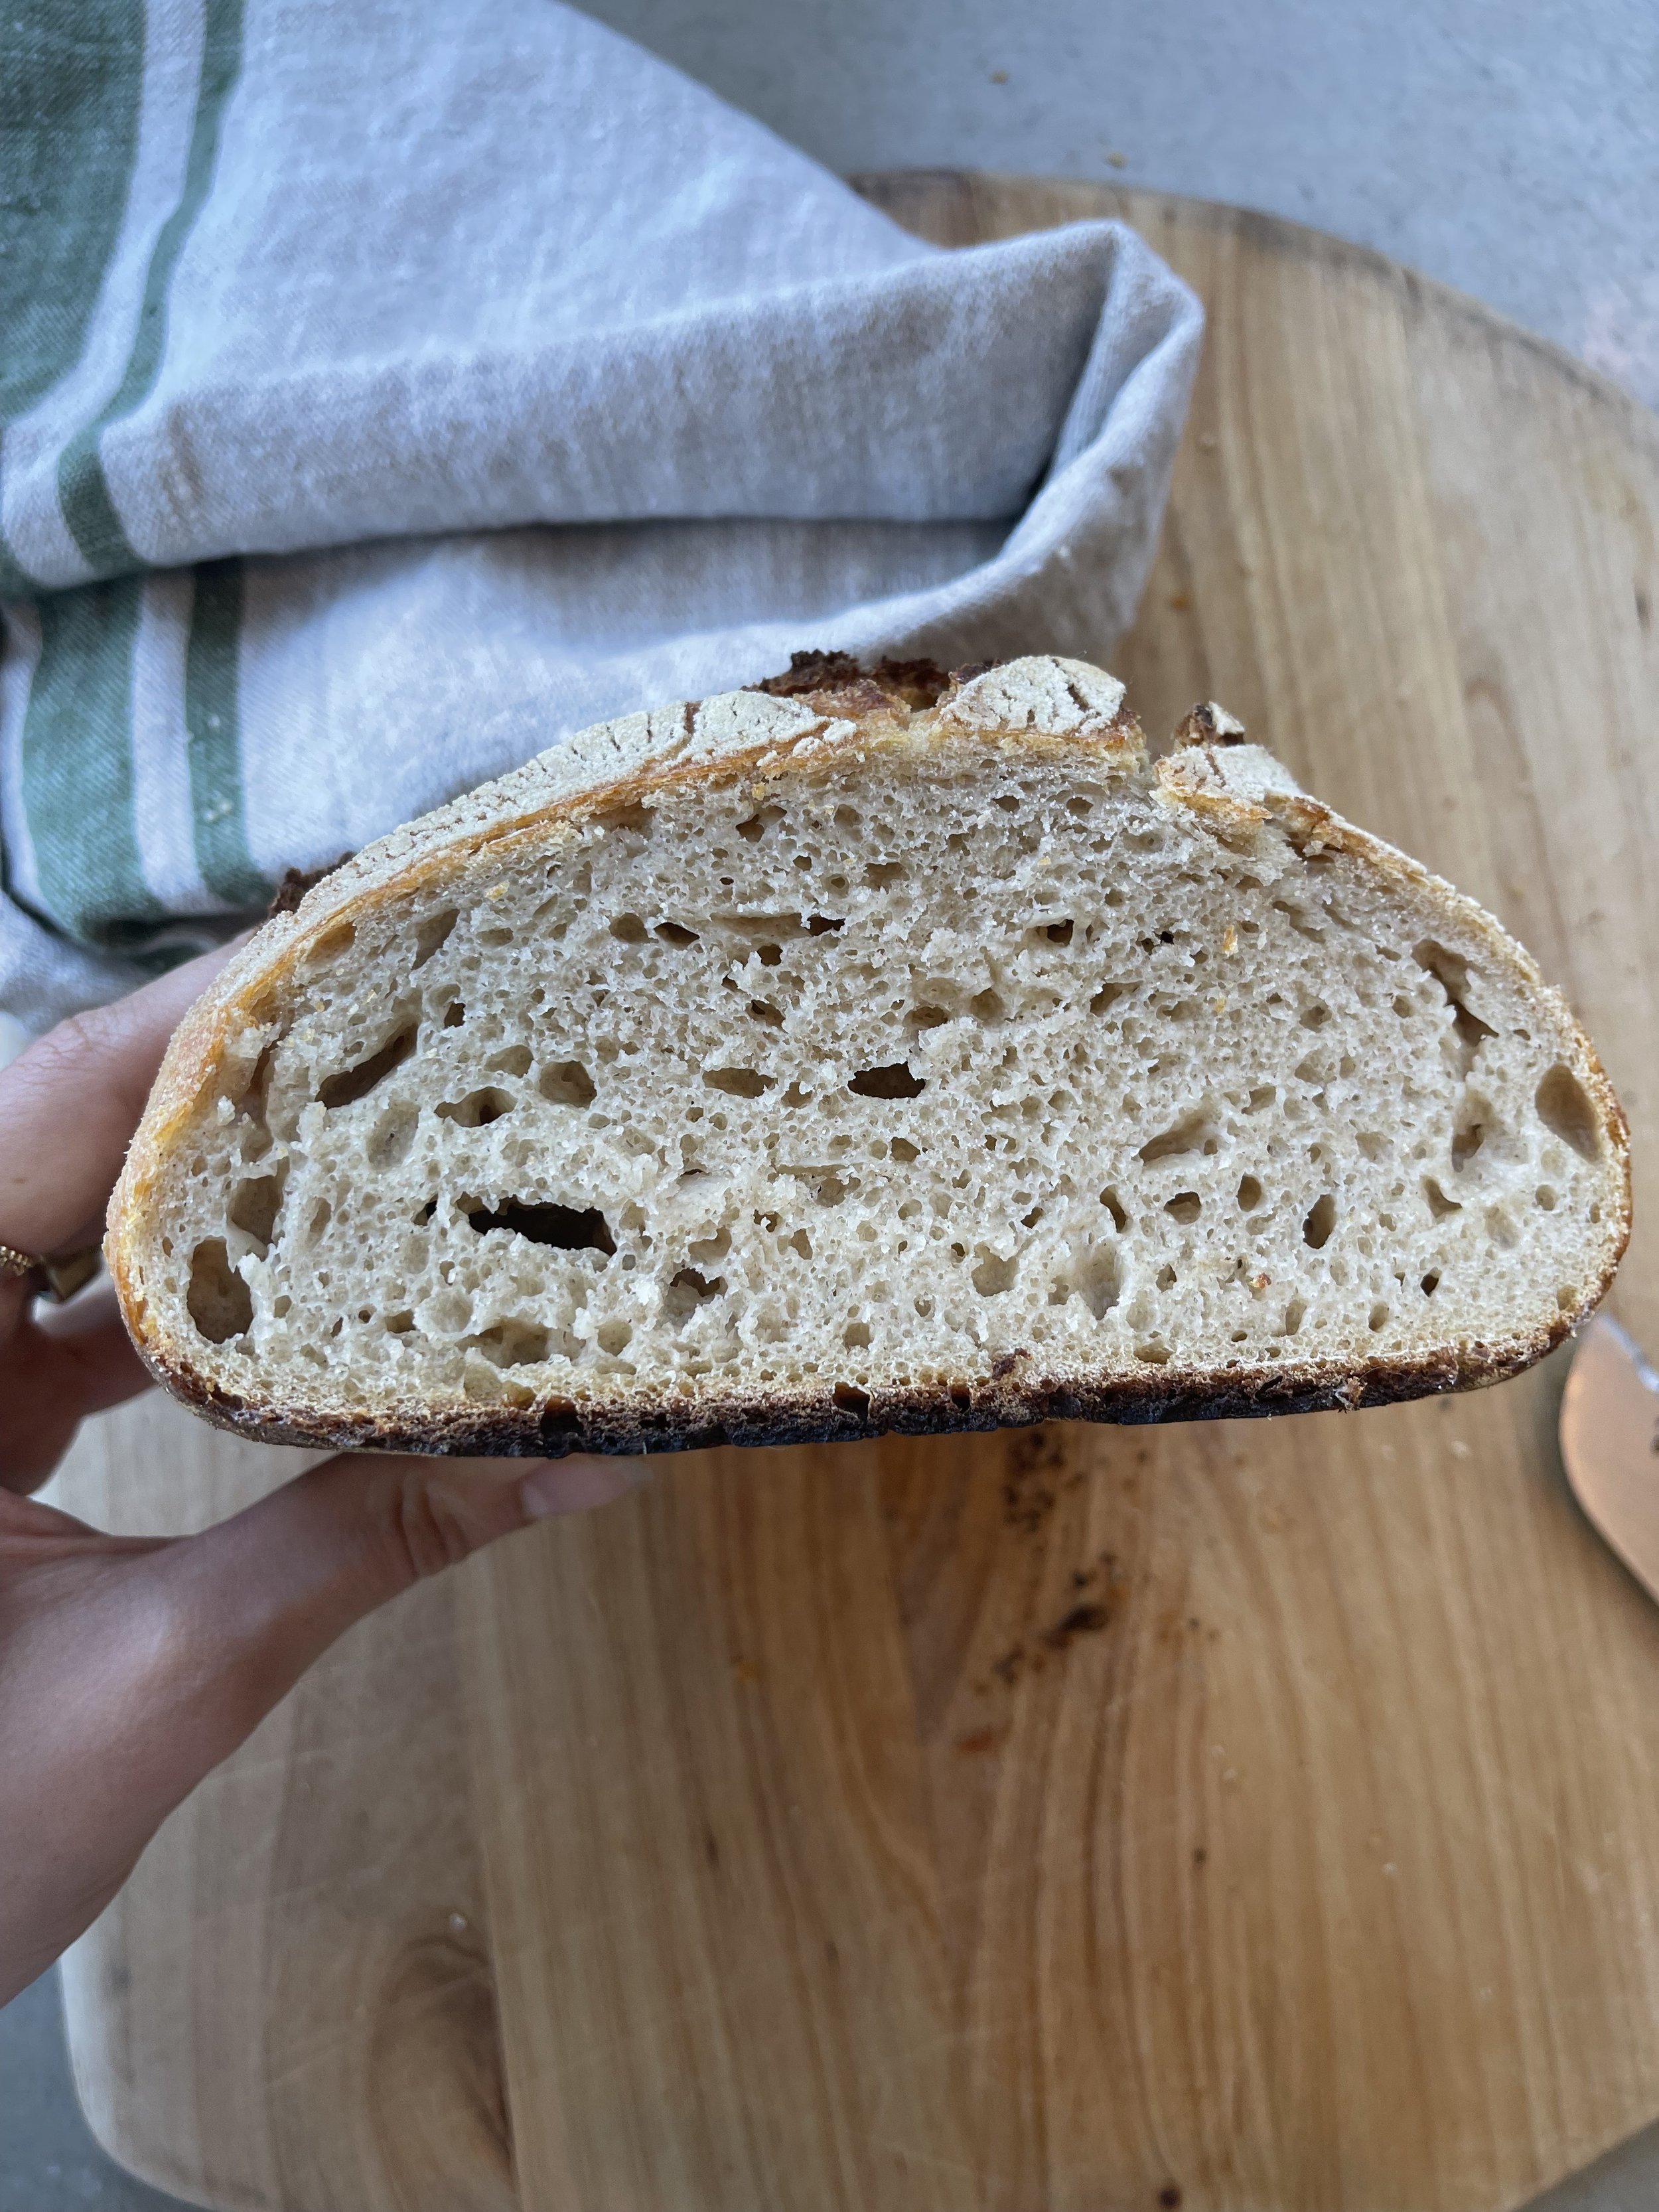
Start stretch and folds pulling up from a side of the dough and placing in the center. Move the bowl 90 degrees and take another side until you’ve formed a loose ball. Place tea towel over. Leave on the table for 12 hours to rise.
Shape the dough by taking it out of the bowl and placing on a floured surface. Shape the dough using a pull and turn method.
Flour the teacloth and place the dough ball in it covered up. Then place it in a bowl so it can proof here for 6 hours. Ideally you have a proofing basket but I don’t and it turns out fine anyway. Place it in the fridge for 6 hours at least or leave to rise on the counter for 2 hours if you want a softer bread.
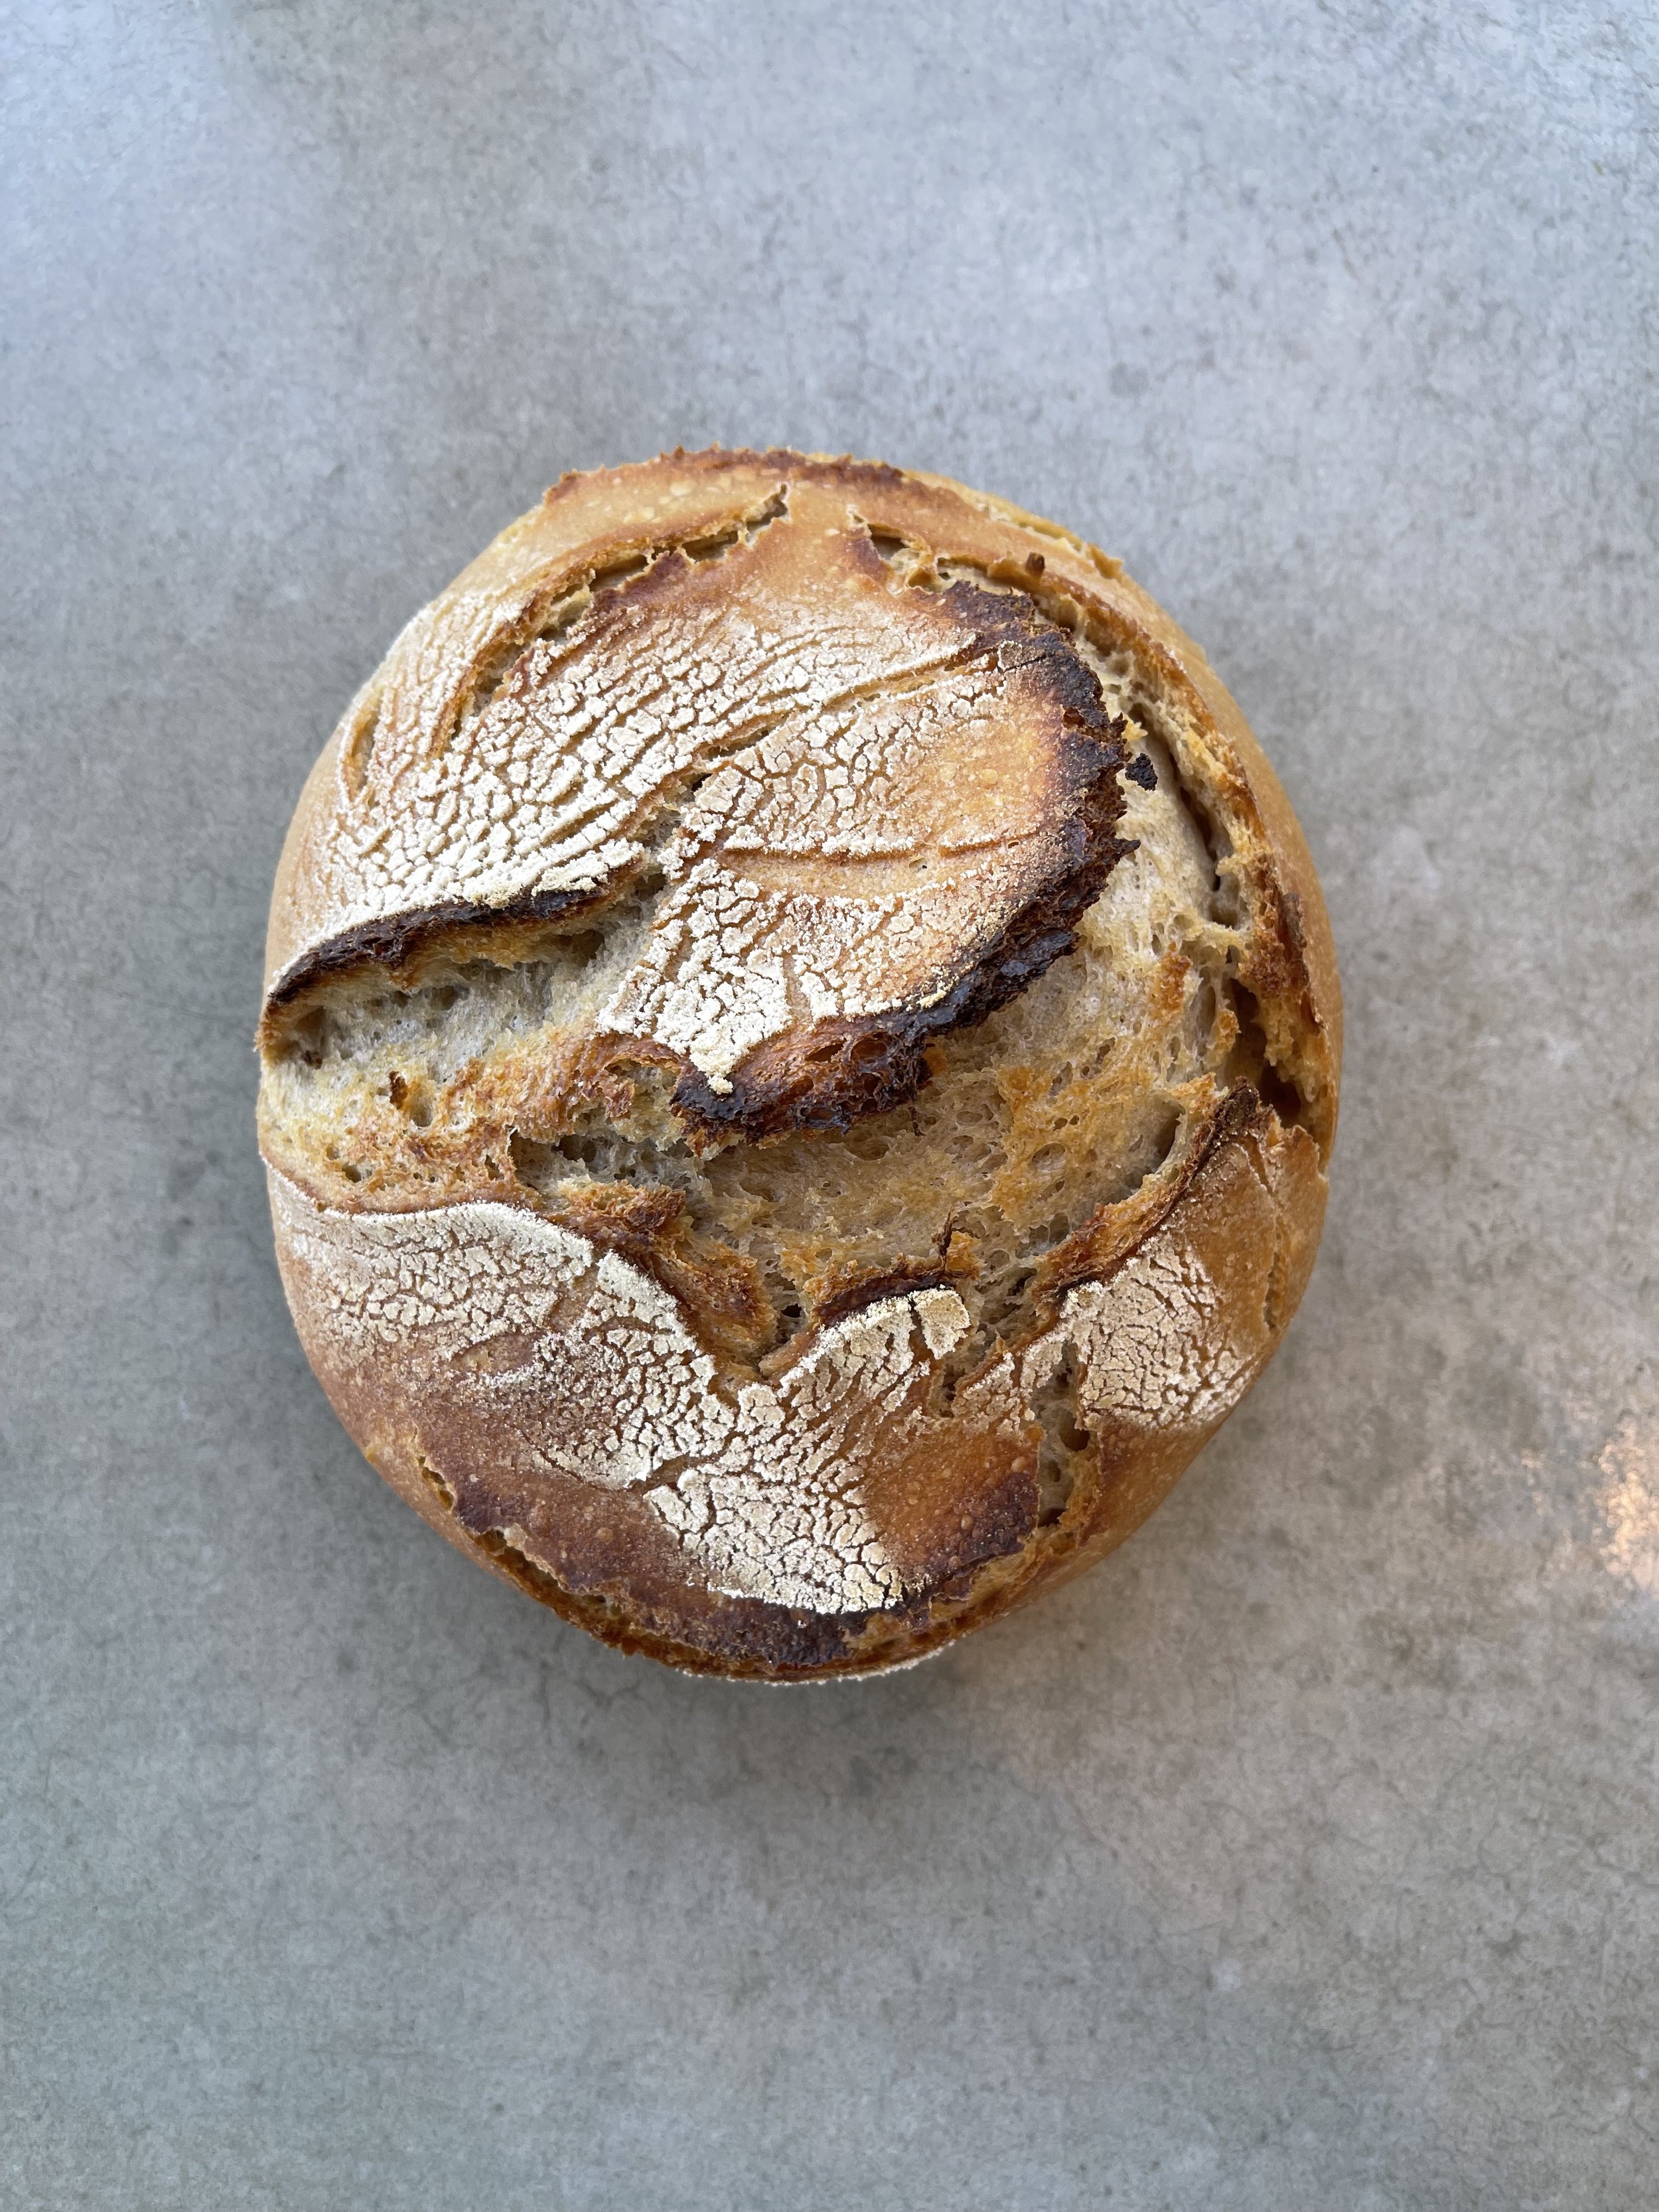
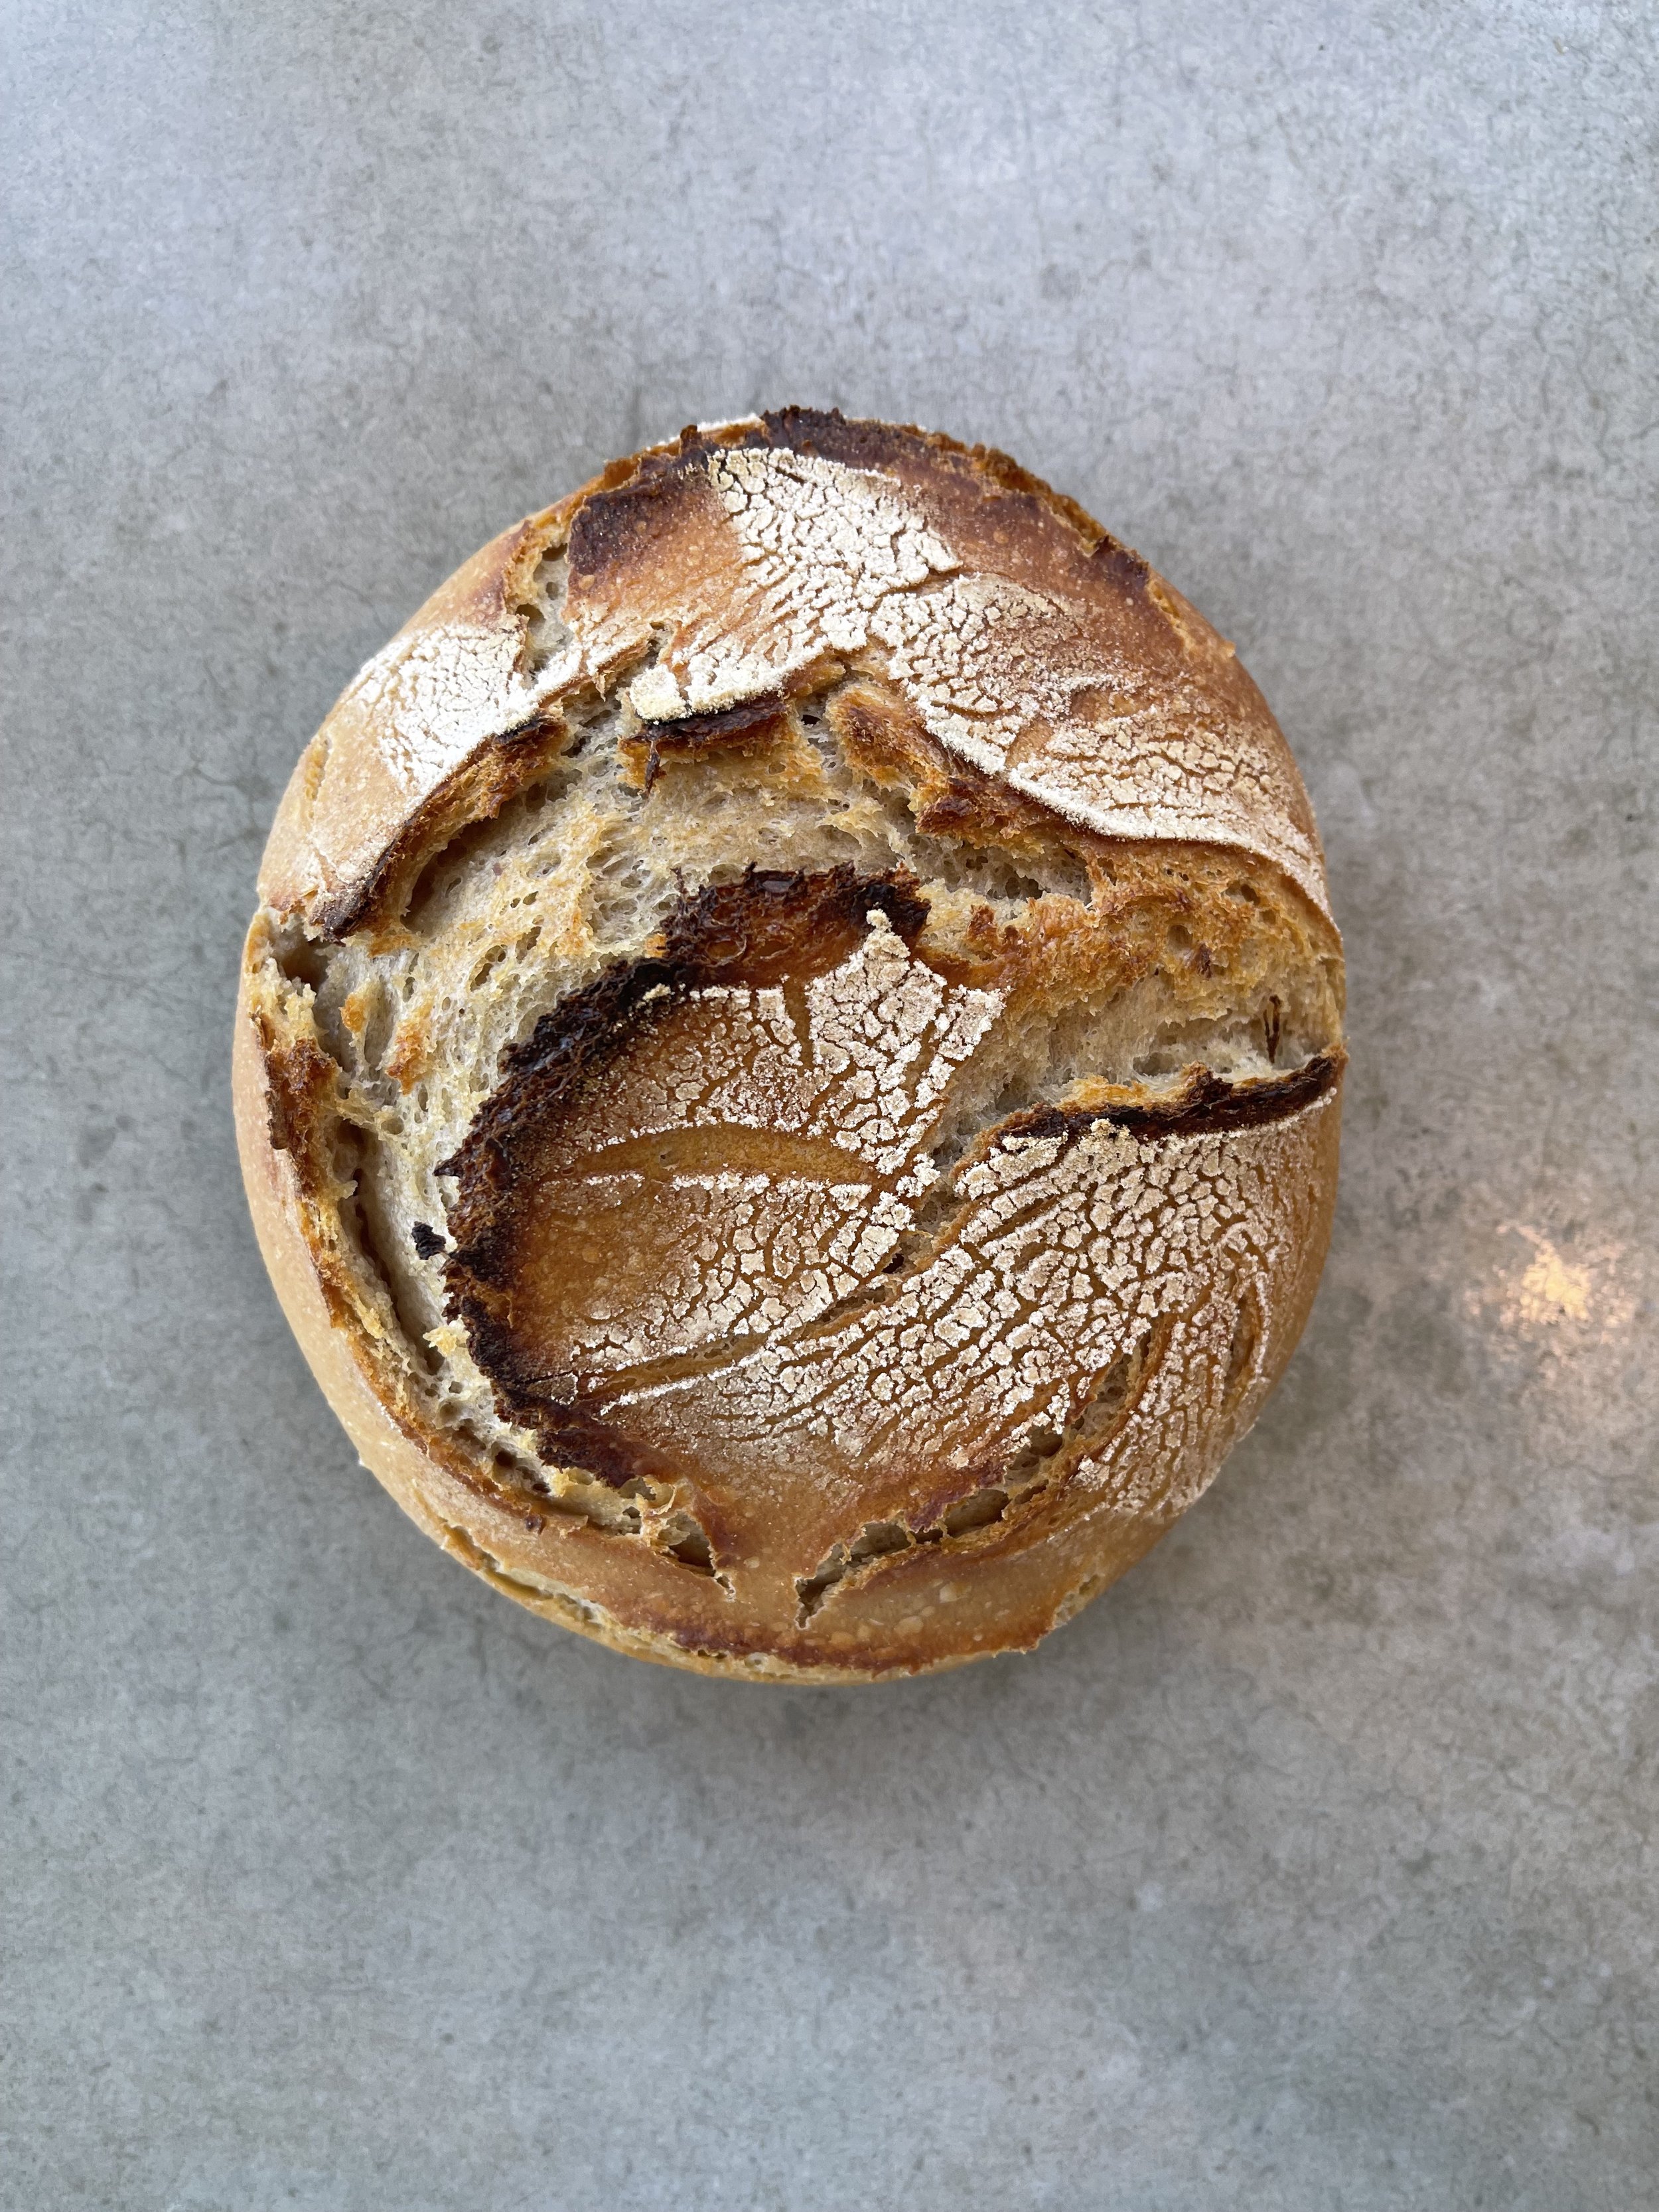
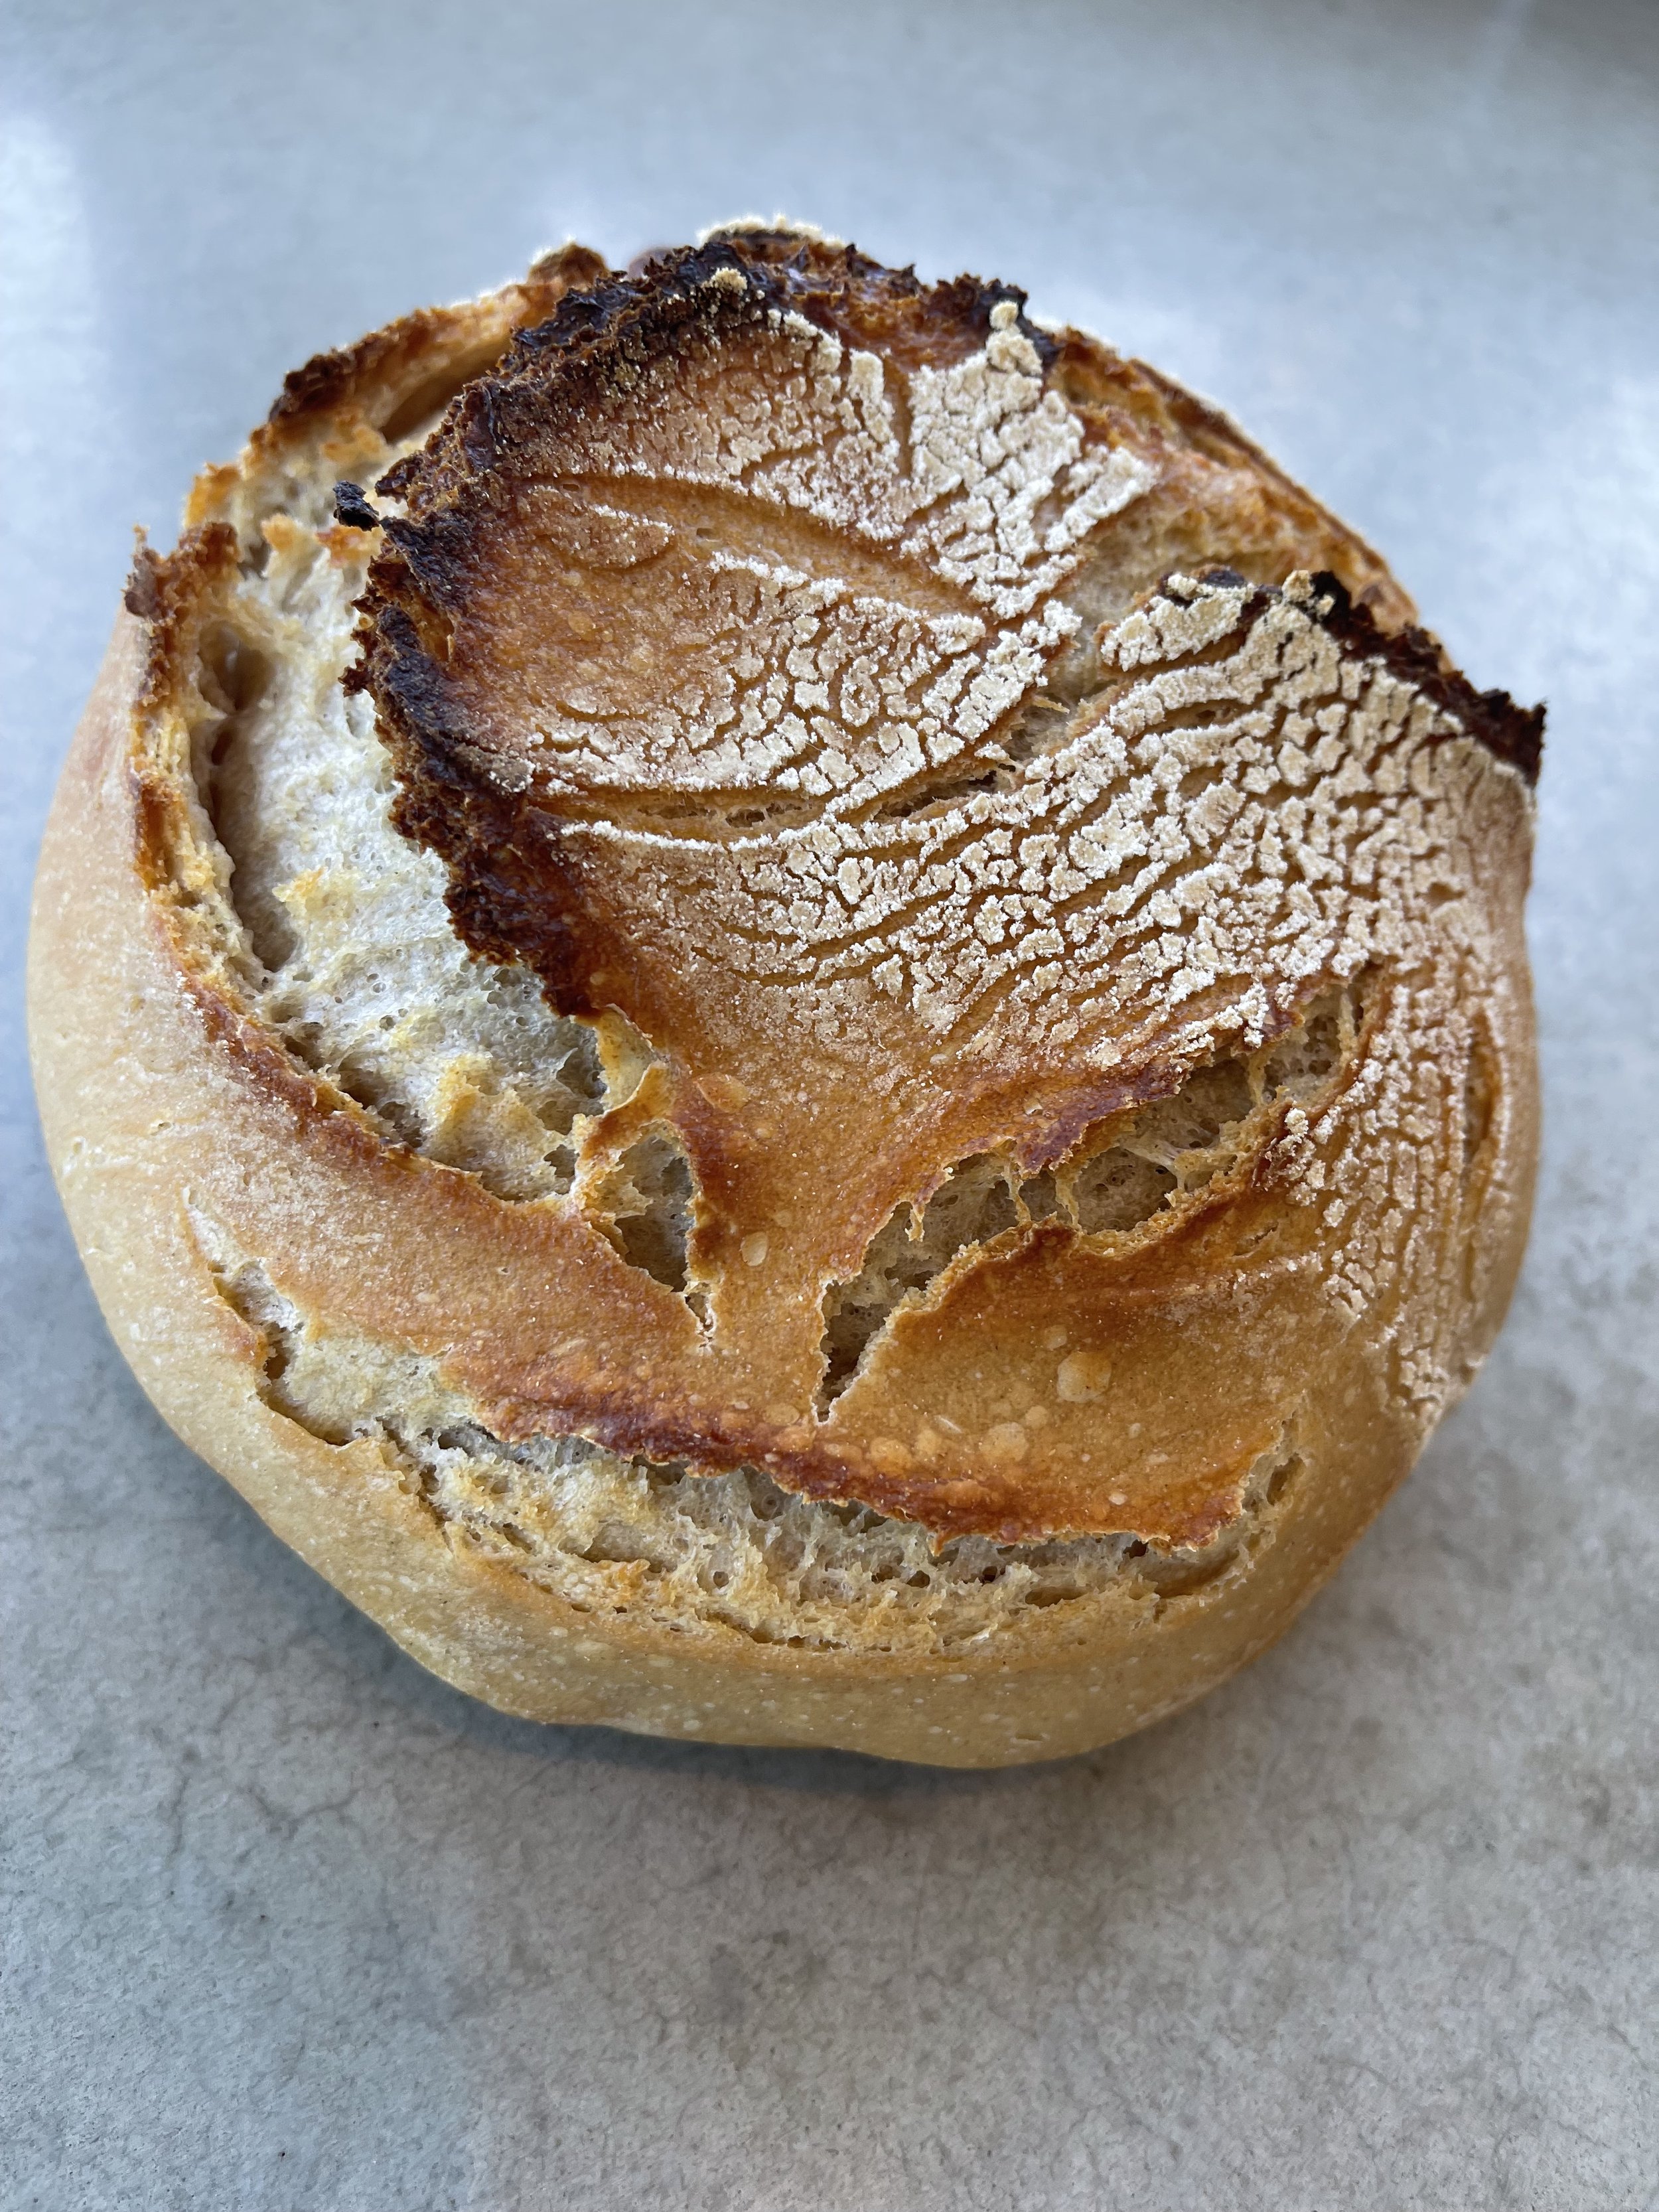
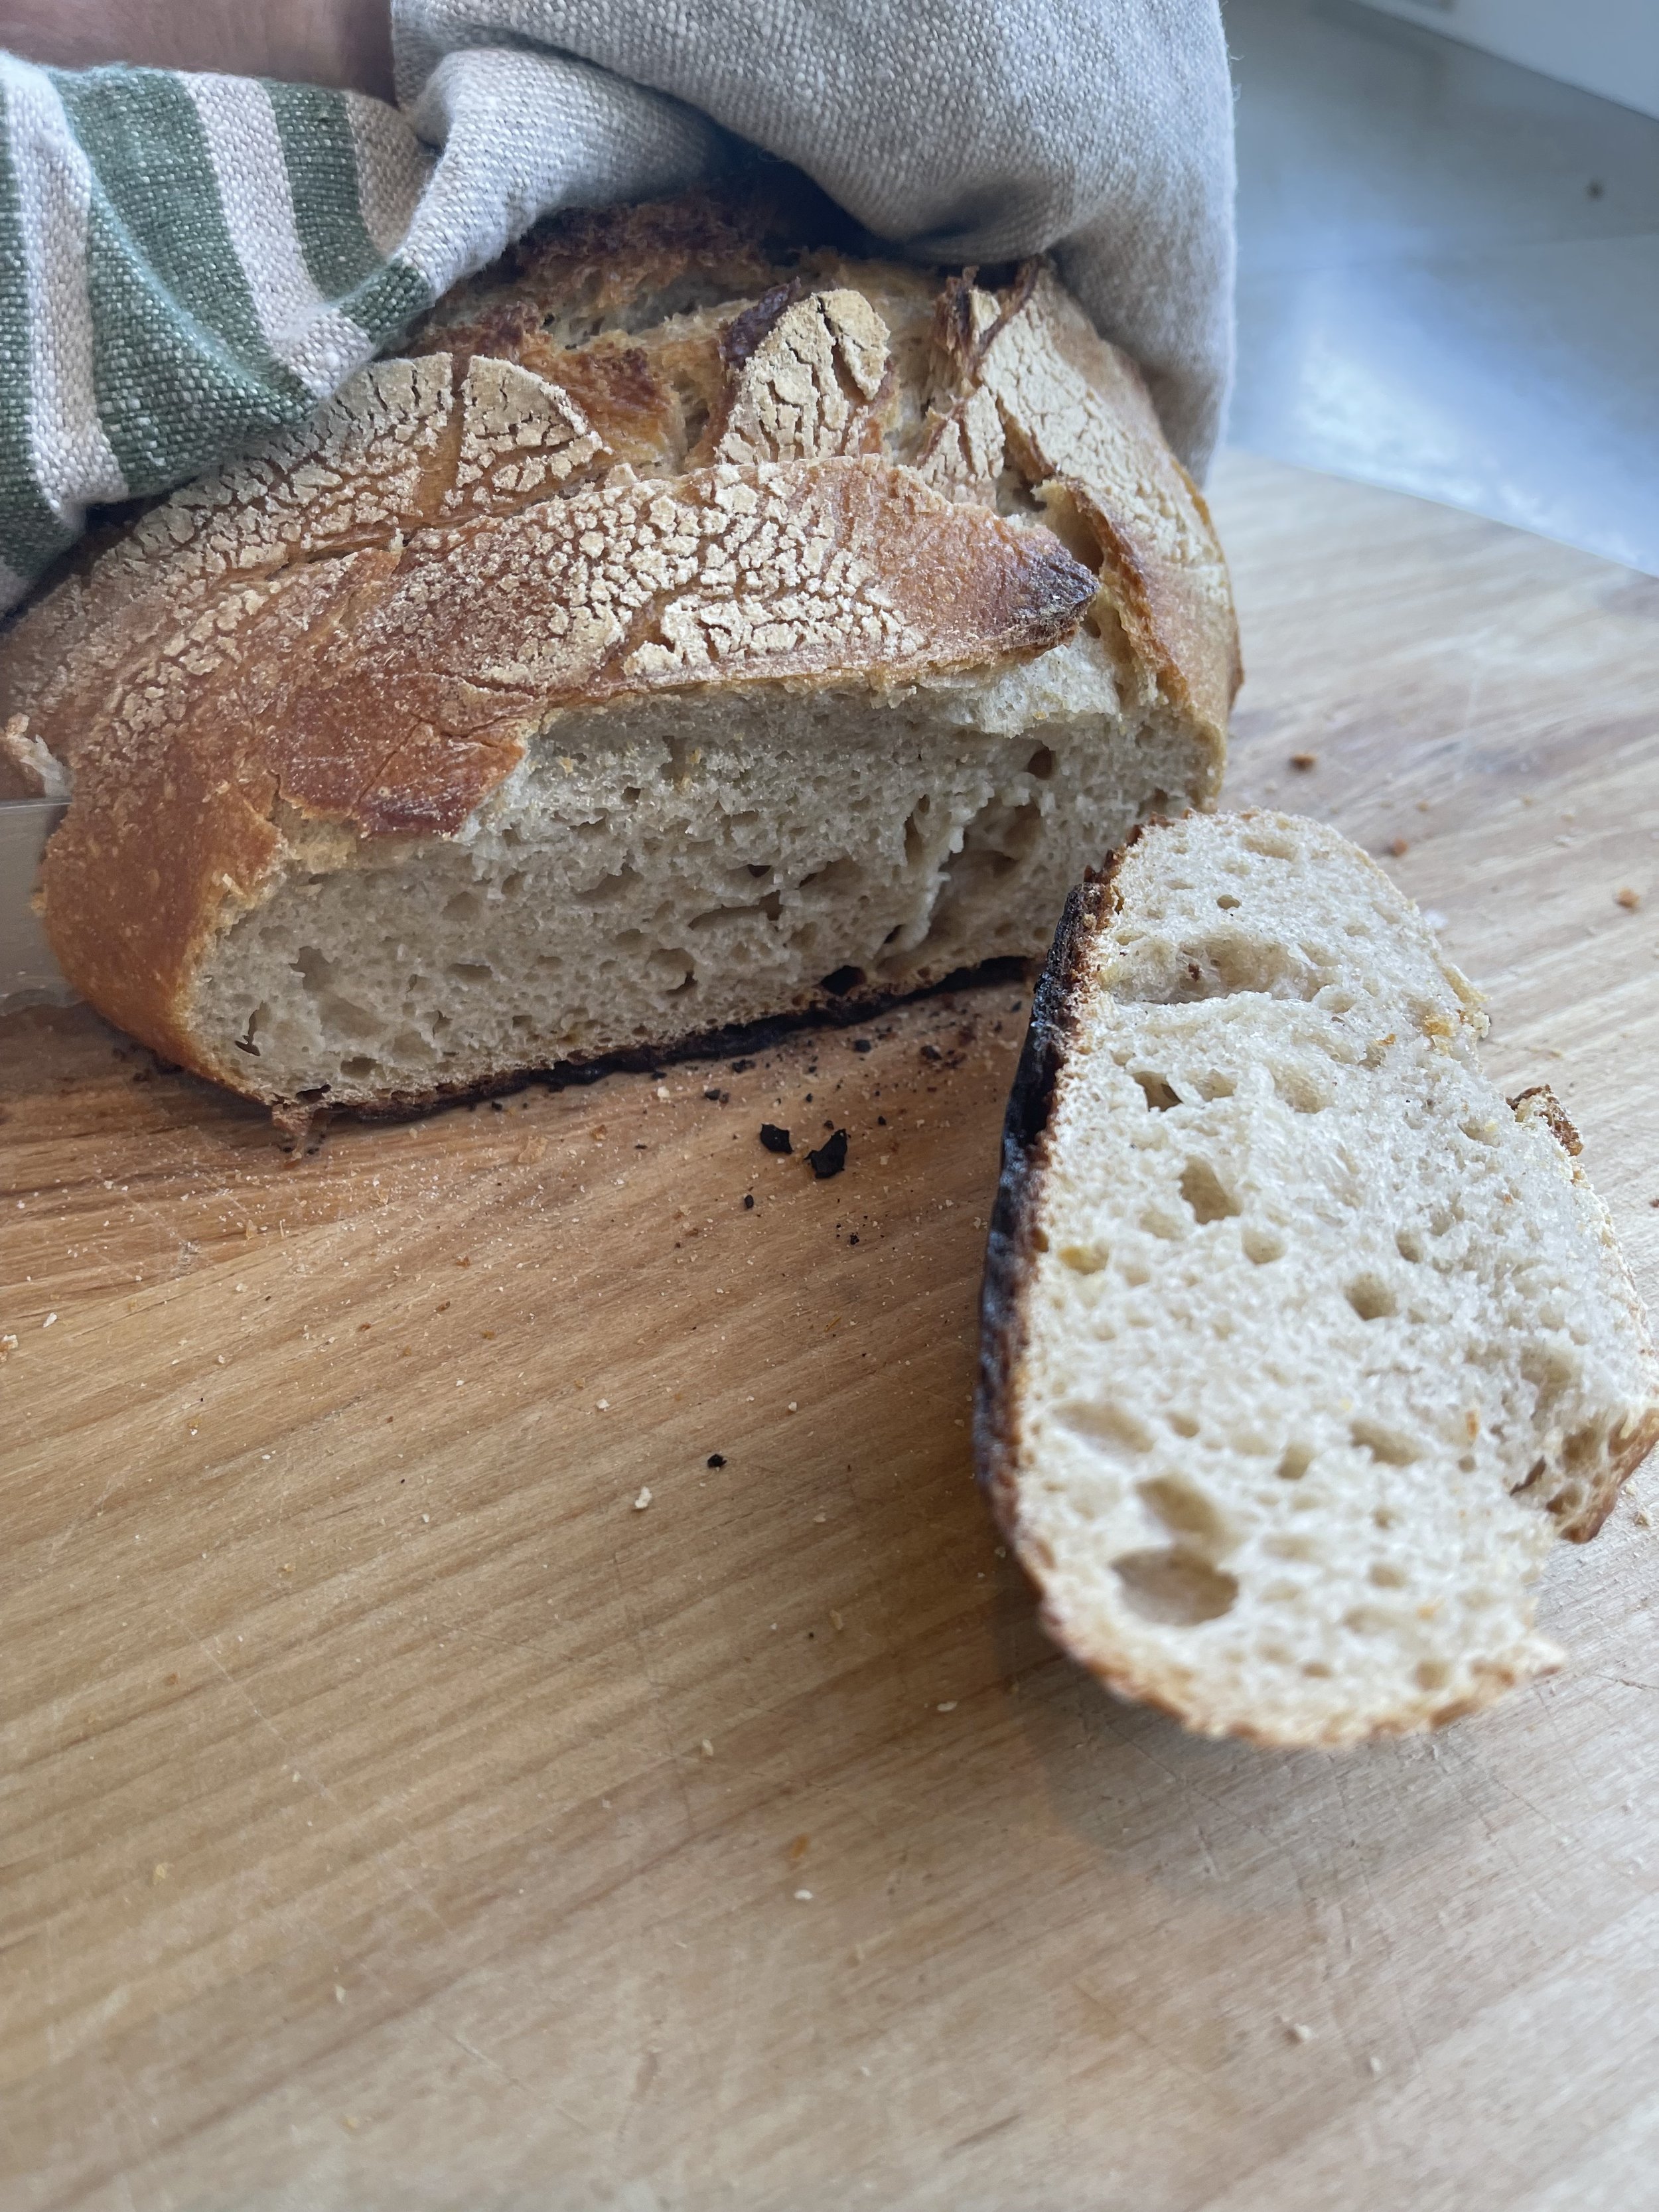
Take the bread out of the fridge and preheat the oven to 450 with the dutch oven inside. Once done preheating, take out the dutch oven and place the dough inside on parchment paper. Add some ice cubes if you want to the bottom of the dutch oven to enhance steaming. Cook for 40 mins with lid on and last 10 minutes with lid off.
Let cool for at least 30 mins for best results but when I’m ravenous I skip that hehe.
Enjoy xx